Si dice che la migliore macchina fotografica è quella che porti sempre con te e dal momento dell’arrivo dell’iPhone è sempre più vero. Ho sempre scattato molte foto e la cosa è peggiorata dopo che mi sono reso conto una macchina fotografica ce l’avevo sempre in tasca, tutti i giorni.
Mobile photography has improved a lot recently and, even if it is not yet as good as a “real” camera, the gap is narrowing. We’ll be having phones with cameras comparable to dedicated devices in a very short time. Having said that, the same rules that apply to digital cameras (or even analogue / film ones) apply to mobile photography as well: composition, light, aperture, ISO etc.
What I’d like to discuss here is the importance of the use of RAW images (I’ve been inspired by this very good article by Sebastiaan de Withdesigner of Halide, a RAW Manual Camera app for iPhone — yes, it means that it shoots with manual controls and the output file can be RAW too).
What does RAW mean?
Sebastiaan de With explains it with lot of details but, to cut it short, a RAW image is exactly everything captured by the sensor of the camera of your phone. Usually every shot you take with your phone is, let’s say, silently post-processed and saved as a *.jpg file. That means that, without you even noticing it, the photo you took is been processed by your phone, compressed and then saved in your photo roll. What you get is a photo that looks a lot like the one you took, but it’s not exactly the same one. Having been processed and then compressed means that lots of details are lost. Probably you’ll never notice that because “It looks good anyway” but the fact is that the output misses a lot of informations and, most of all, is not the original file. In other words: the image file, uncompressed and full of informations, is lost forever.
On the other hand, a RAW file has all the information, uncompressed. That means that you just have to extract them using the proper software. Where are usually all these details lost in a compressed file and saved with the uncompressed, RAW format? Basically in shadows (dark areas) or highlights (bright areas).
You’d better know before
A RAW file is usually very dark. A lot darker than the photos you get used to shooting in jpg. Don’t forget that it carries all the information about what you photographed: highlights and shadows and everything in between. All packed into one thick thing that weights a lot more than a compressed file. A jpg produced by your phone is about 3 Mb while a RAW is three or more times heavier. You need an app/program to extract all these information and allow the image you had in mind to surface. You need apps like Darkroom, Snapseed, VSCO or Lightroom to handle these files.
Don’t be confused if it looks too dark. It’s fine. It’s got to be like this. All you need is there, you just need to pull it out.
An example
I shot this one while I was skiing. I stopped, took my iPhone (8 Plus) out, fired Halide, selected RAW format, pushed the shutter. Done.
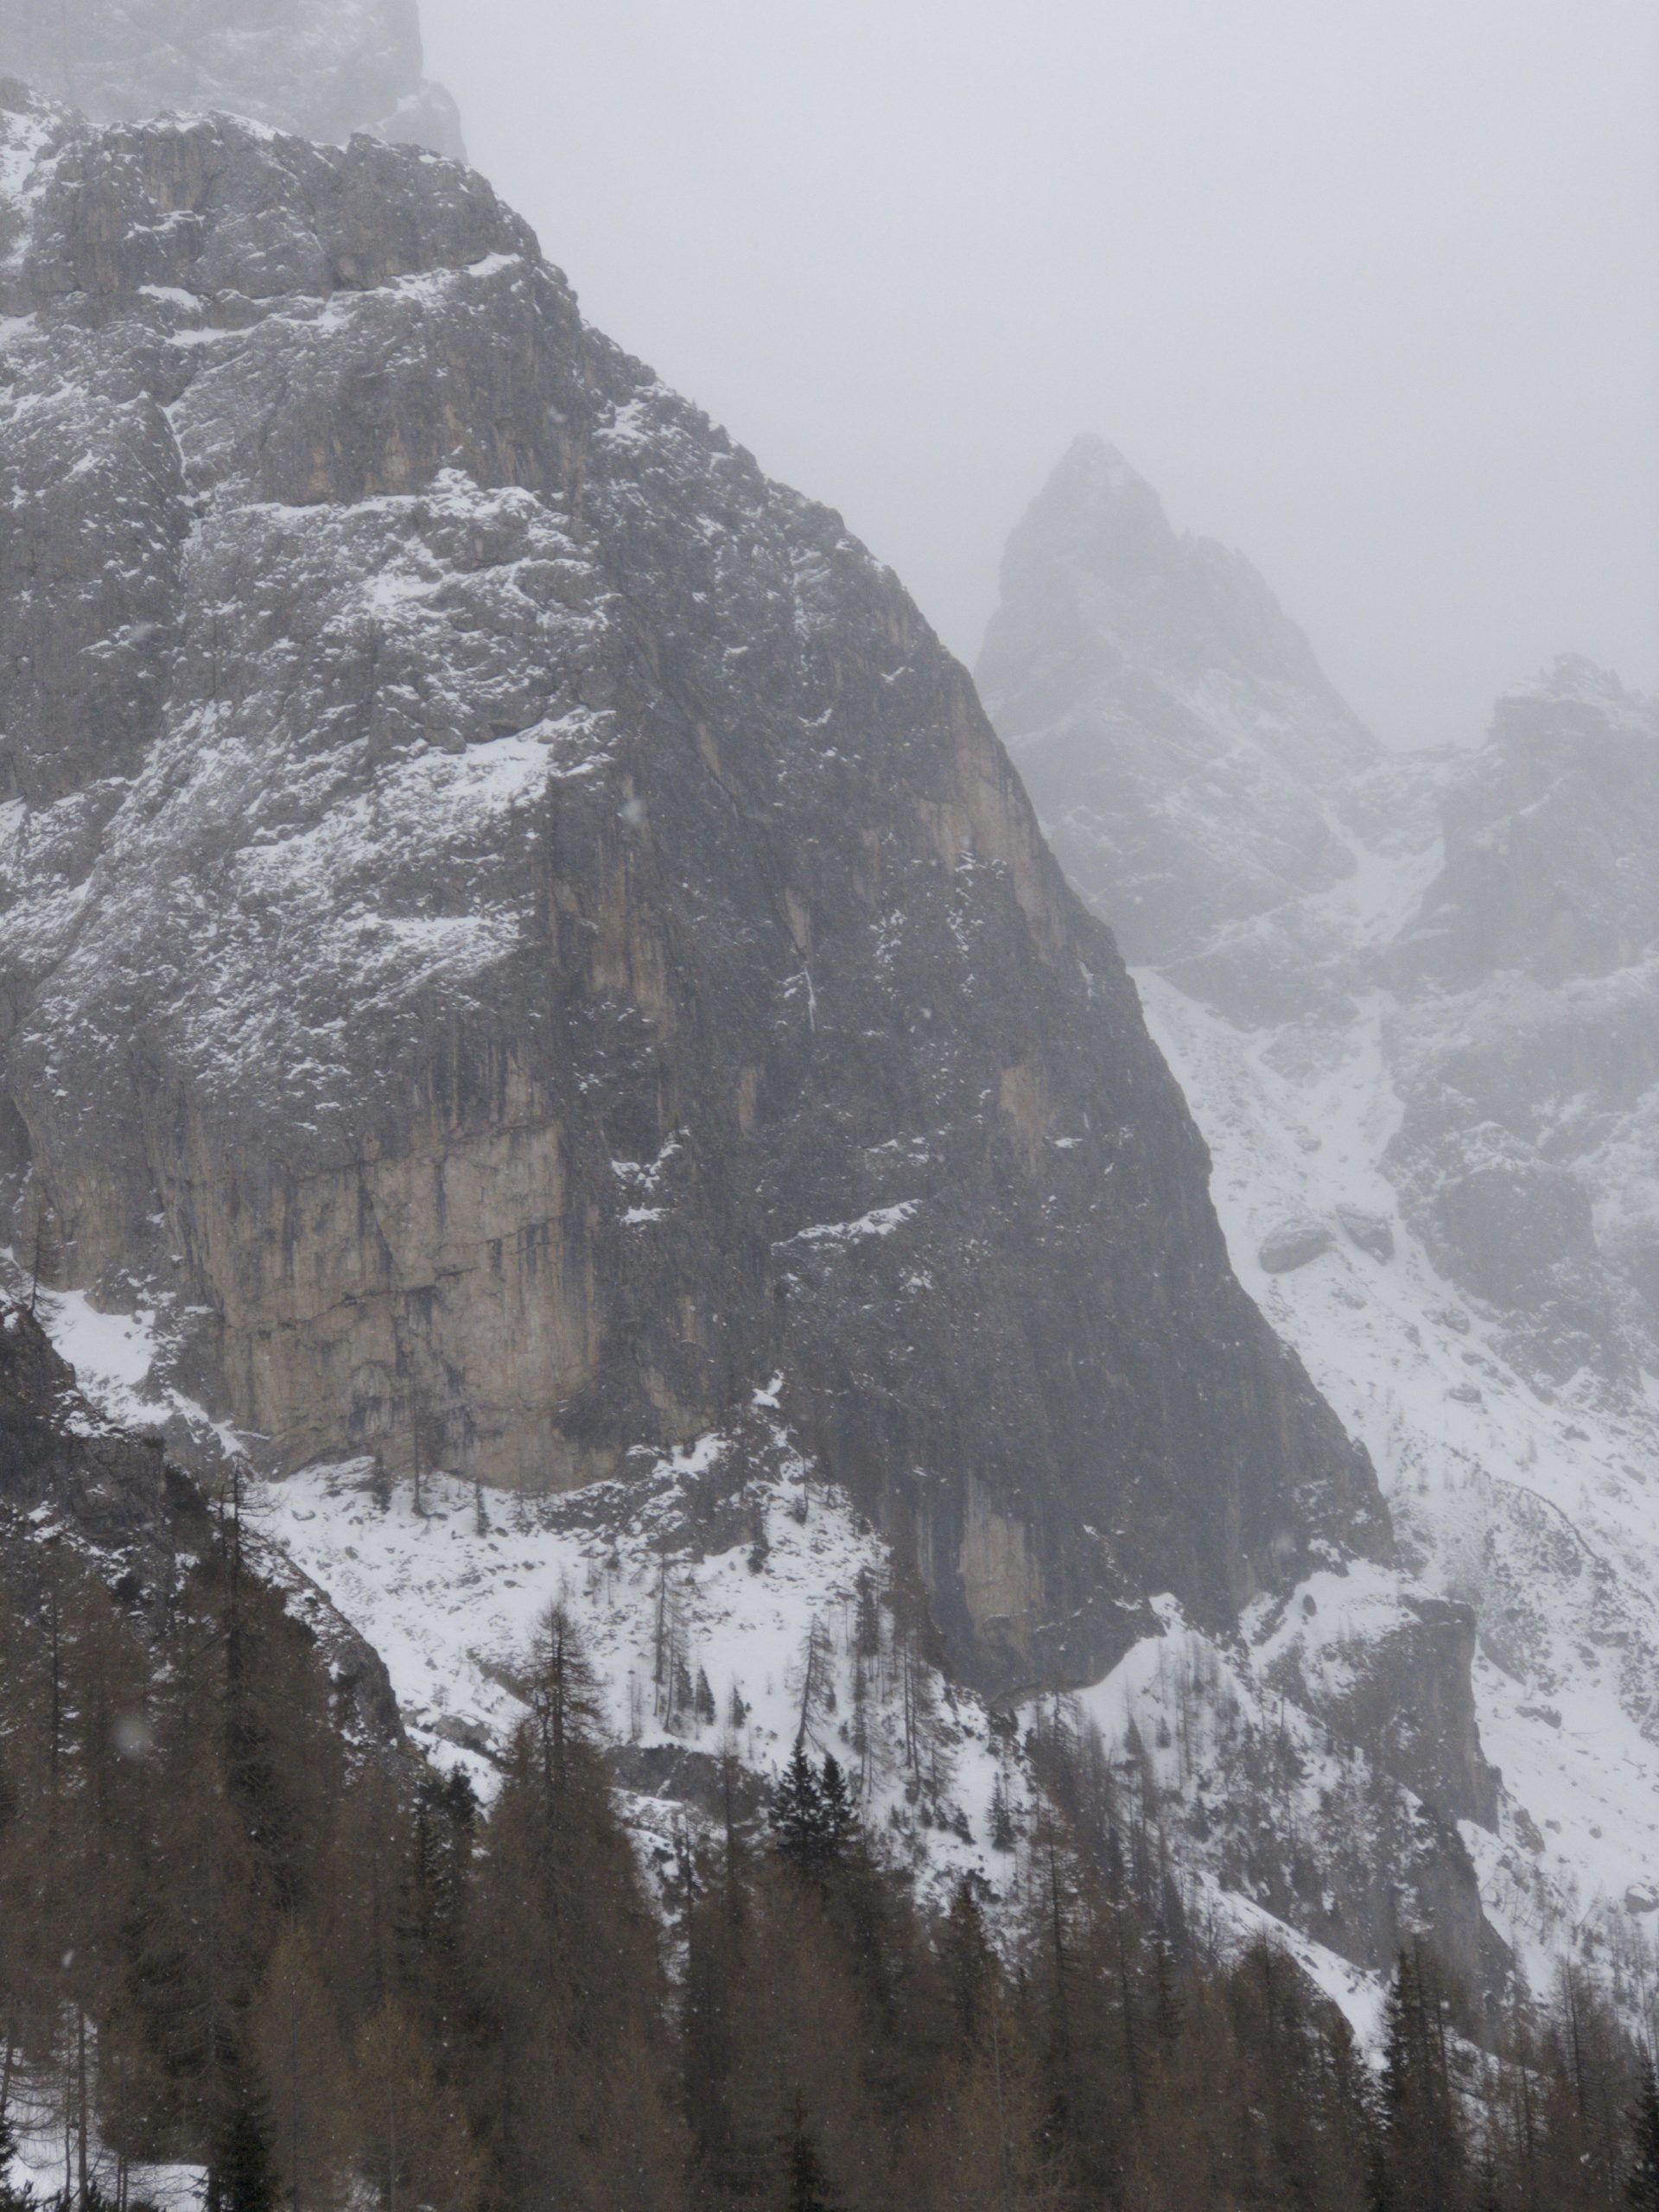
Looks ugly, isn’t it? It is.
The weather was gloomy and grey, the worst to get a decent shot. Plus it was flat because of the clouds: no shadows, no contrast.
What I knew from the start however was that I already had what I needed to get something good out of it: details in shadow areas, more definition, white balance controls.
I then edited it on the fly, and I mean that: while walking on a street, in few minutes.
How? With a couple of apps.
1. A heavy editing app
That’s how I call an app able to handle all the heavy stuff, like bringing out of darkness all the fine details buried there. It could be Lightroom, Snapseed, VSCO or Darkroom. I use Lightroom.
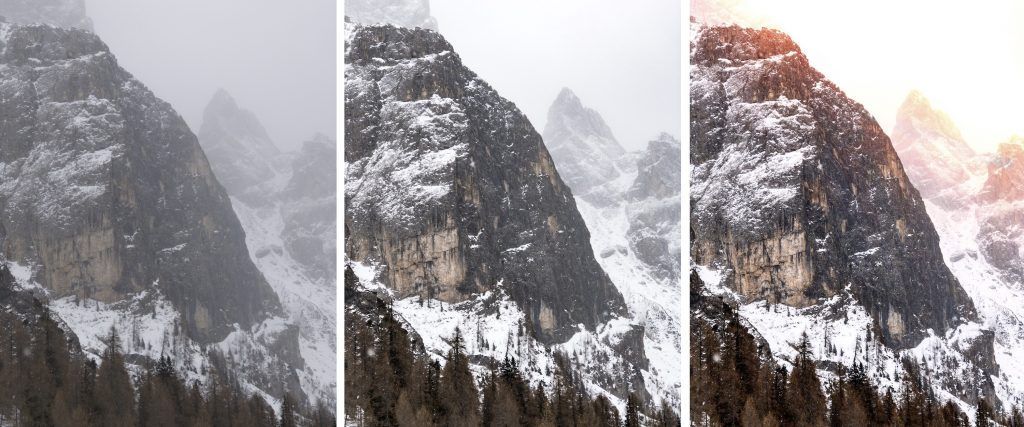
This is the result:

Not yet exciting but way more better than the original one. If you look closer you can notice many more details in the trees and on the rocks and more contrast. It is important to notice that all these details are not tricks: they were already there, just buried.
Let’s get closer to the rocks. More contrast, more details. The rocks on the background look more defined.
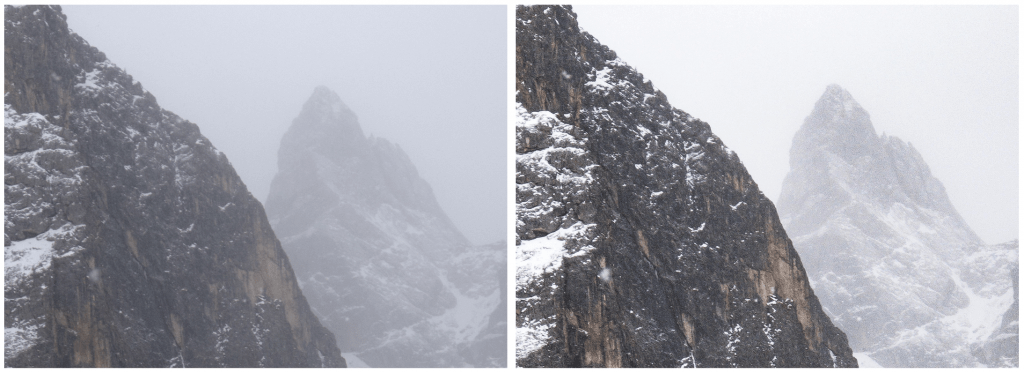
La cosa è ancora più evidente guardando gli alberi. Ora si vedono tutti i tronchi e pure alcuni fiocchi di neve. C’è più profondità nell’immagine modificata: ci sono alberi in primo piano e sullo sfondo. E andando ancora oltre, le rocce dietro di loro e un paio di vette lontane.Guarda come un’immagine molto piatta inizia ad essere viva: ha profondità e spessore. Ma non è ancora abbastanza. 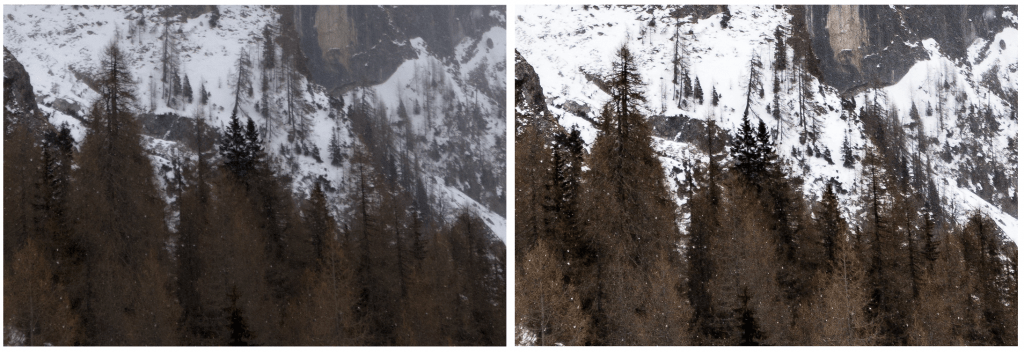
2. Let’s add some FX
Remember? It was a gloomy day: no sun at all. No problem: we can add it later, using an app like LensLight.
I added an Epic Sun right behind the farther peaks. My only advice is not to get too heavy with lights and be somehow realistic. In this case the sun could have really been there (it was actually there, but covered by the clouds) and I helped it a little bit to come out. Is it fake? Yes, but not entirely: the light source was real; I added it in post-production just because it was not available during the shooting and — more important — because it gave the picture another depth layer and a soft and warm tone.
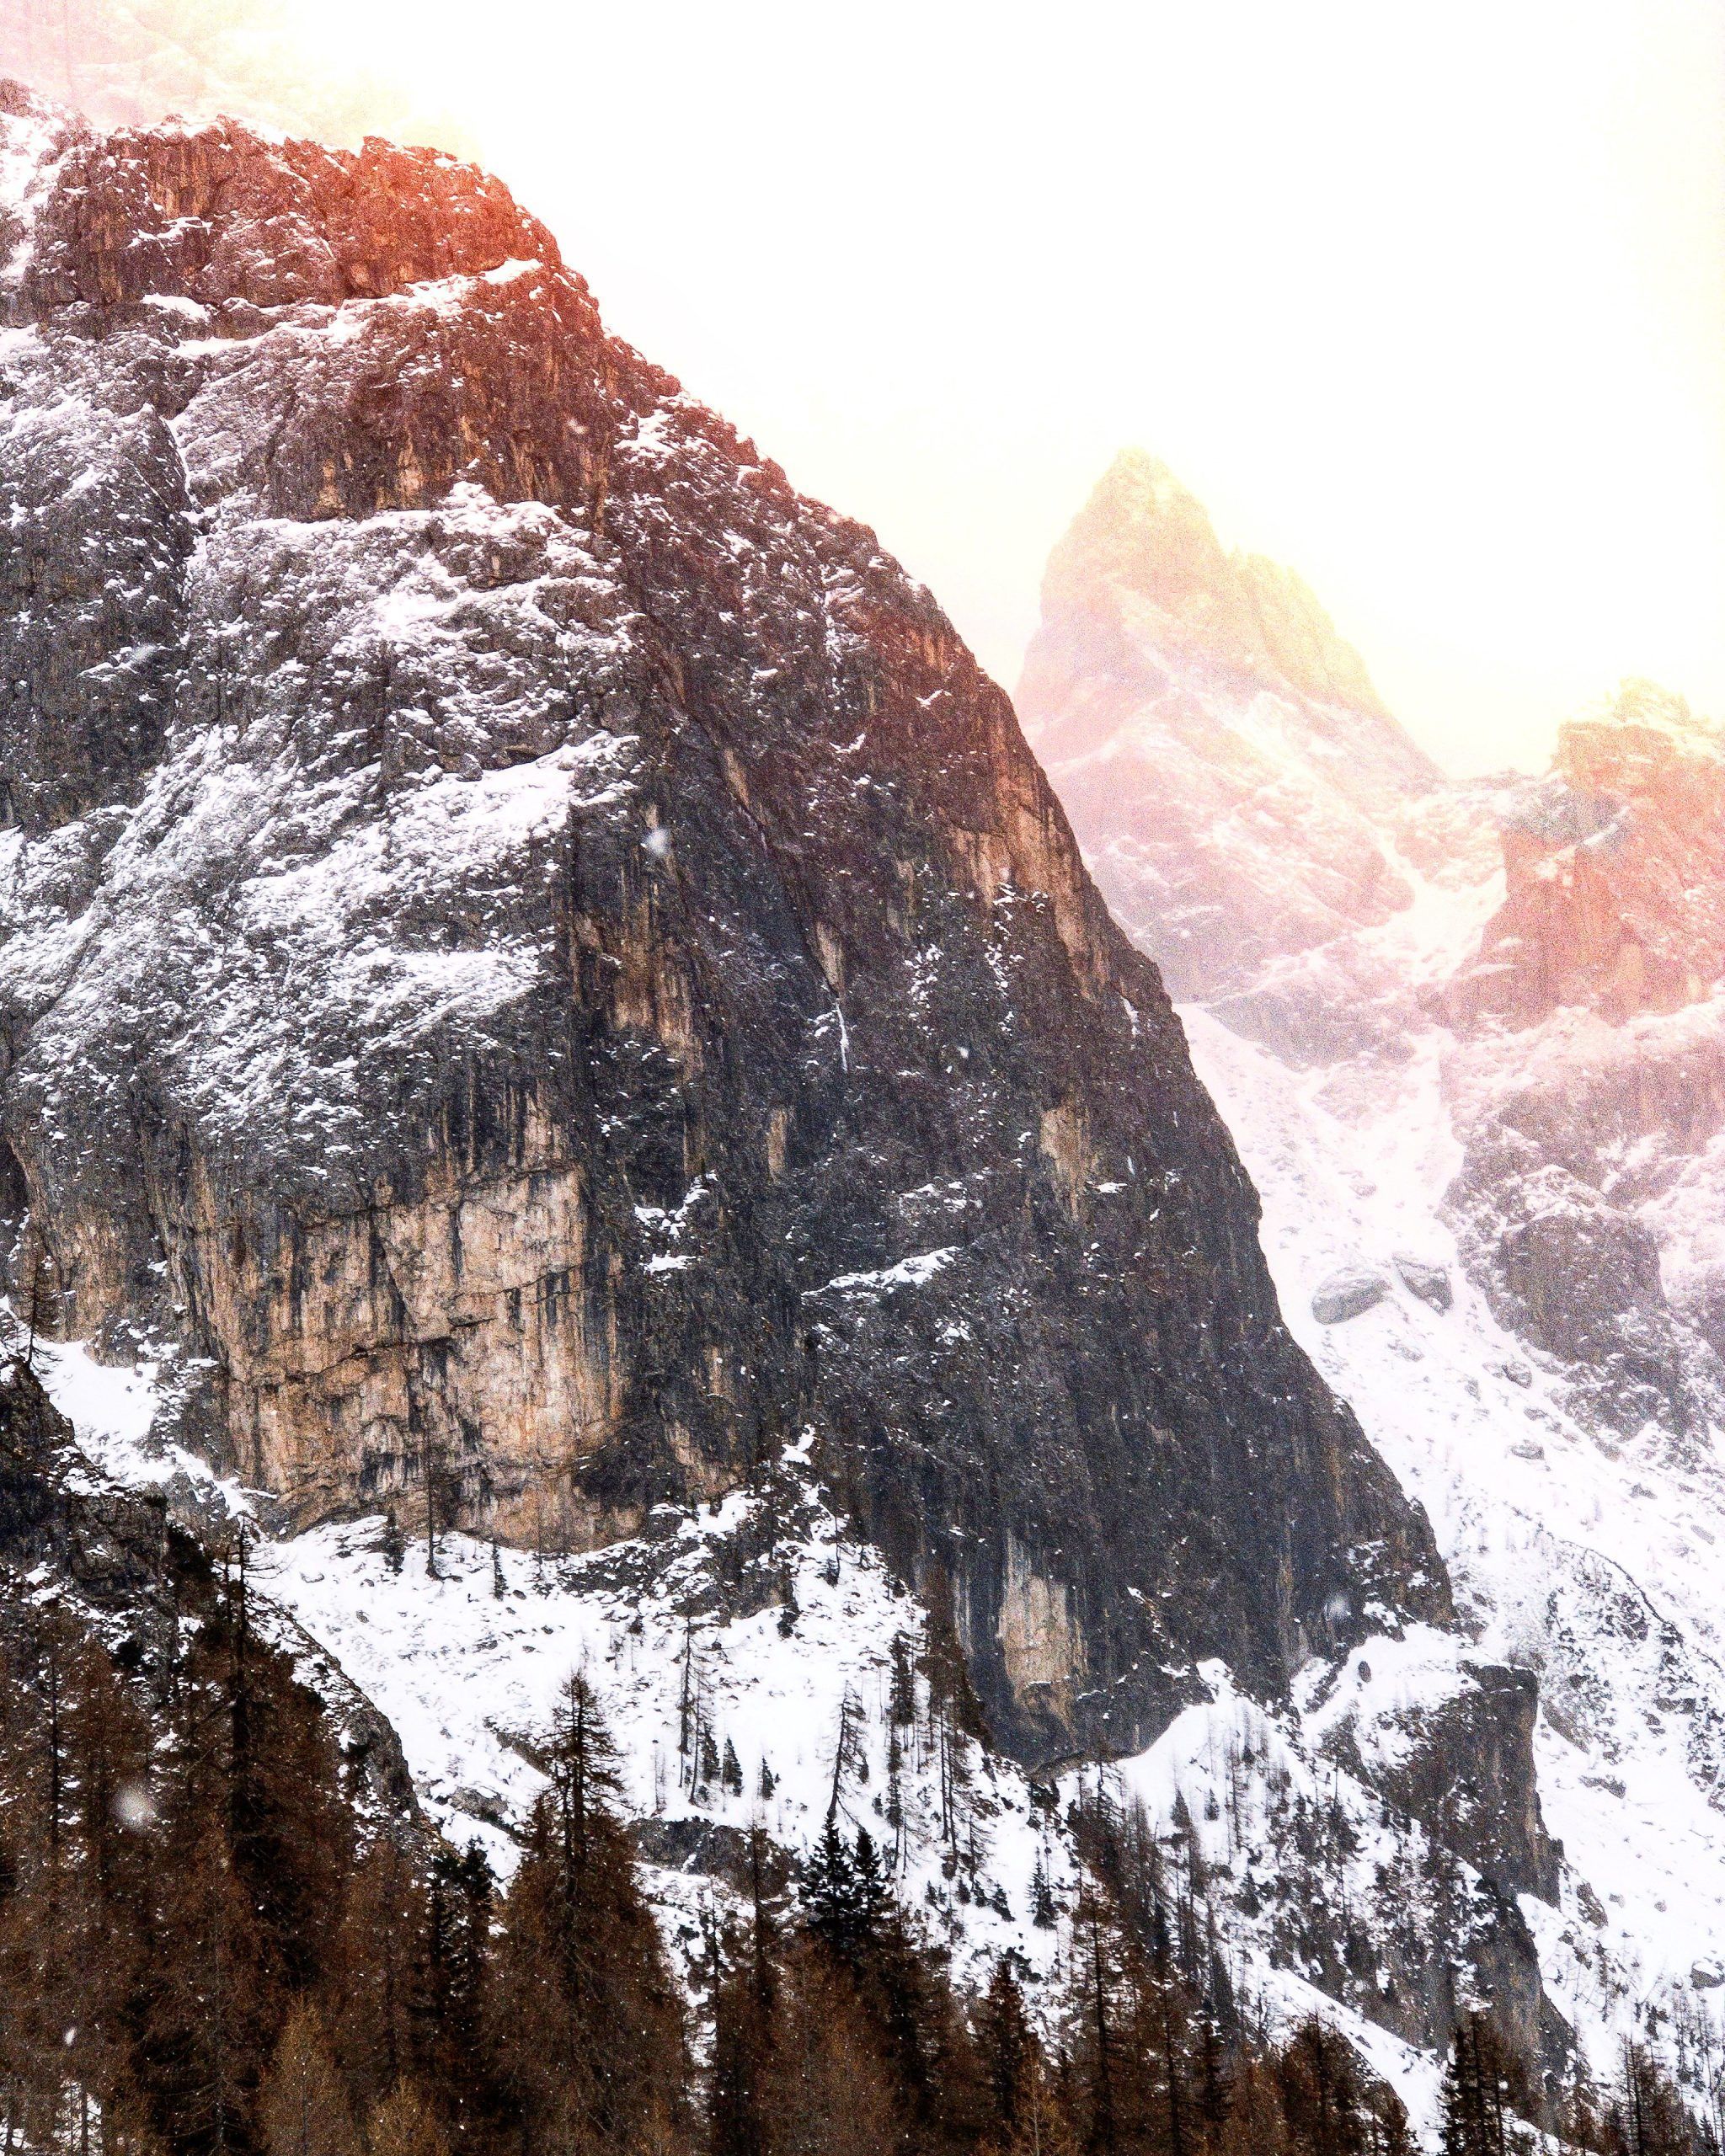
The result (I must repeat: done “on the fly” — it could have been much more processed ) is quite good. It could have been better but I’m fine with it since it proves my point: sometimes it’s better to shoot in RAW. Not all the times, but at least when you’re sure you want to get something good out of a photo. Because it matters to you or because light conditions are not the best ones. In this case, go RAW.
Mobile photography keeps on getting better and better. RAW files on a smartphone were unthinkable years ago but now they’re here. You can get amazing results using your best camera (the one that’s always with you) and a handful of apps. Without compromising the quality.
Conclusion
I consider the photo above a pretty decent one. It’s not my kind nor I find it particularly interesting: it’s just a landscape, even if a beautiful one of the Dolomites. But it says all is worth to say about RAW photos and post-production as well:
- Be realistic and avoid the fairy tale effect (over processed images that look like The Sleeping Beauty is about to show up)
- Try to pull out the image you saw while shooting, working on the RAW file. Your camera is already pretty amazing but it’s only able to guess what you’re seeing. Sometimes it will correctly guess the tones of that beautiful sunset but other times it won’t. You’ve got it in RAW format? You can work on it and get what you saw that day.
- Since you start from a very flat image, try to find out and show as many depth layers as you can, using masks, light sources and so on.
Your best camera is getting even better.